
The Regional Humanities Network Resource Portal is a members-only area of the site that stores useful resources for RHN Members. This guide explains how the portal works, and how to administrate it.
Administrating Portal Users
A special user role exists for users whose only role on the website is as a Regional Humanities Network Member: RHN Portal Member. This role has limited capabilities within the admin area. They can only see private posts or resources within the portal. They can not do any of the administrative tasks available to other roles, such as editing pages or changing site settings.
Creating a New Portal User
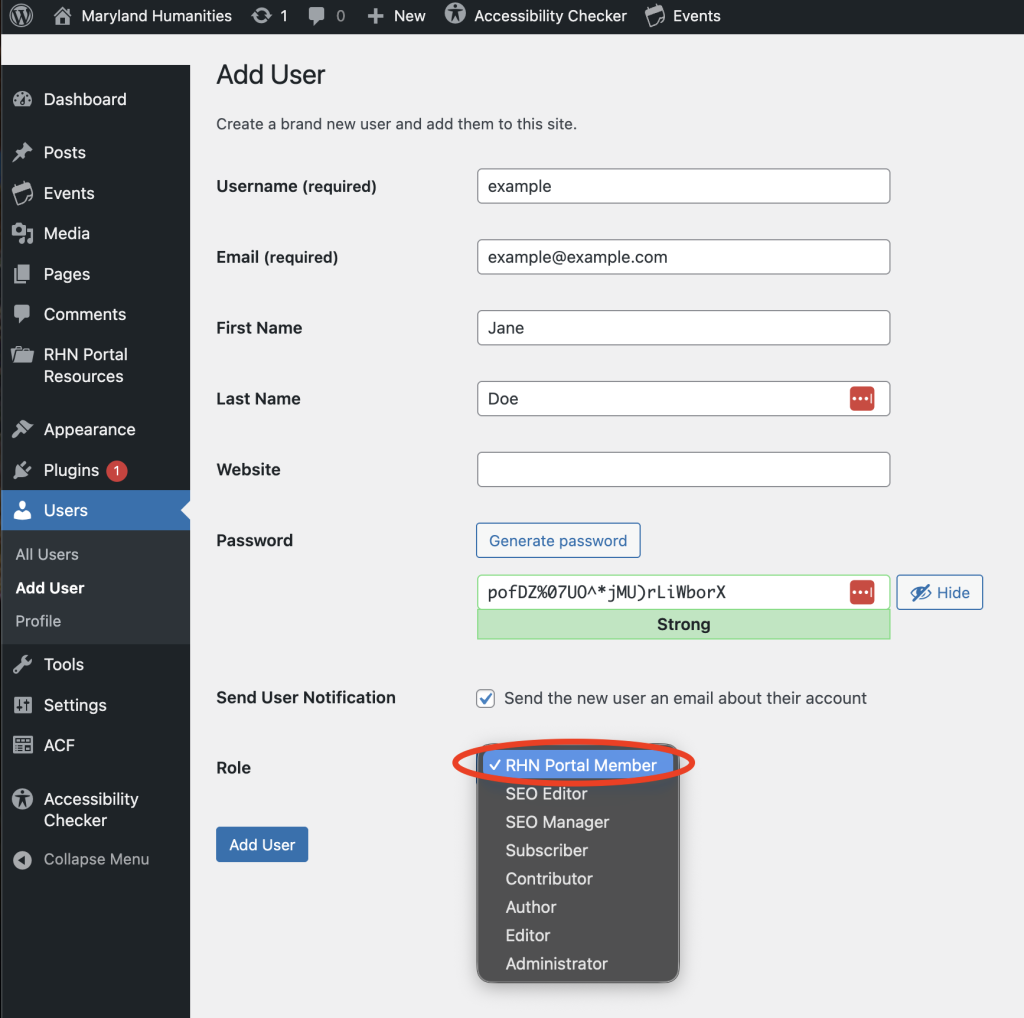
- Create a new user using the Add User page. Or go to Dashboard > Users > Add User.
- Fill in the user’s details. Each user must have a unique email address.
- Ensure the user’s role is set to “RHN Portal Member”
- Check the “Send User Notification” checkbox to notify the user that their account has been created and provide them instructions for how to login.
Organization Accounts
We recommend making one account per paying entity. If the member is a single person, then that member gets their own individual account. If the member is an organization or group, that group gets one login that they must share amongst themselves. This will ease the user management tasks for the MDH team.
Temporarily Deactivating a Portal User
To temporarily disable a portal user’s access, edit their role to “No role for this site” instead of “RHN Portal Member.” This will keep their account in the database, but prevent them from seeing portal resources. We recommend temporarily disabling accounts that you expect will re-subscribe in the future.
Deleting a User
You can delete users if you expect them to remain unsubscribed forever. Delete users via the Users settings page (Dashboard > Users).
Deleted accounts cannot be recovered, although new accounts can be made with the email address of deleted accounts.
Portal User Flow
Users enter the portal through the Portal Gateway Page. Once logged in, the user can enter the Portal Index. The Portal Index provides a list of resources and tools to filter them.
The diagram below illustrates how users move through the Portal system.
Portal Gateway Page
The Portal Gateway Page is how all users enter the portal. This page is visible within the site’s sidebar navigation, and can help promote the portal to potential interested members.
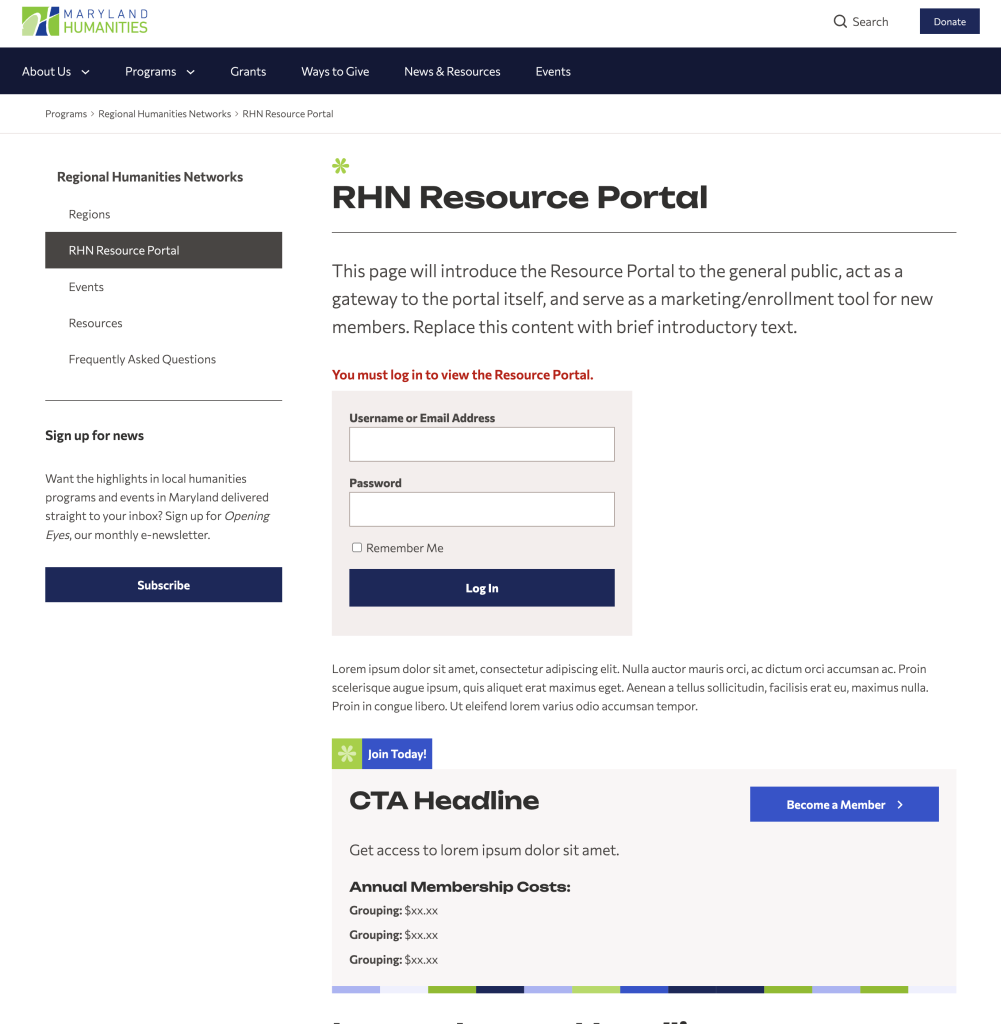
Logged out users will see a login form on the gateway page. They can use this form to login to their portal account. It’s a generic login form for the site, so you can also use it to log in to your admin account.
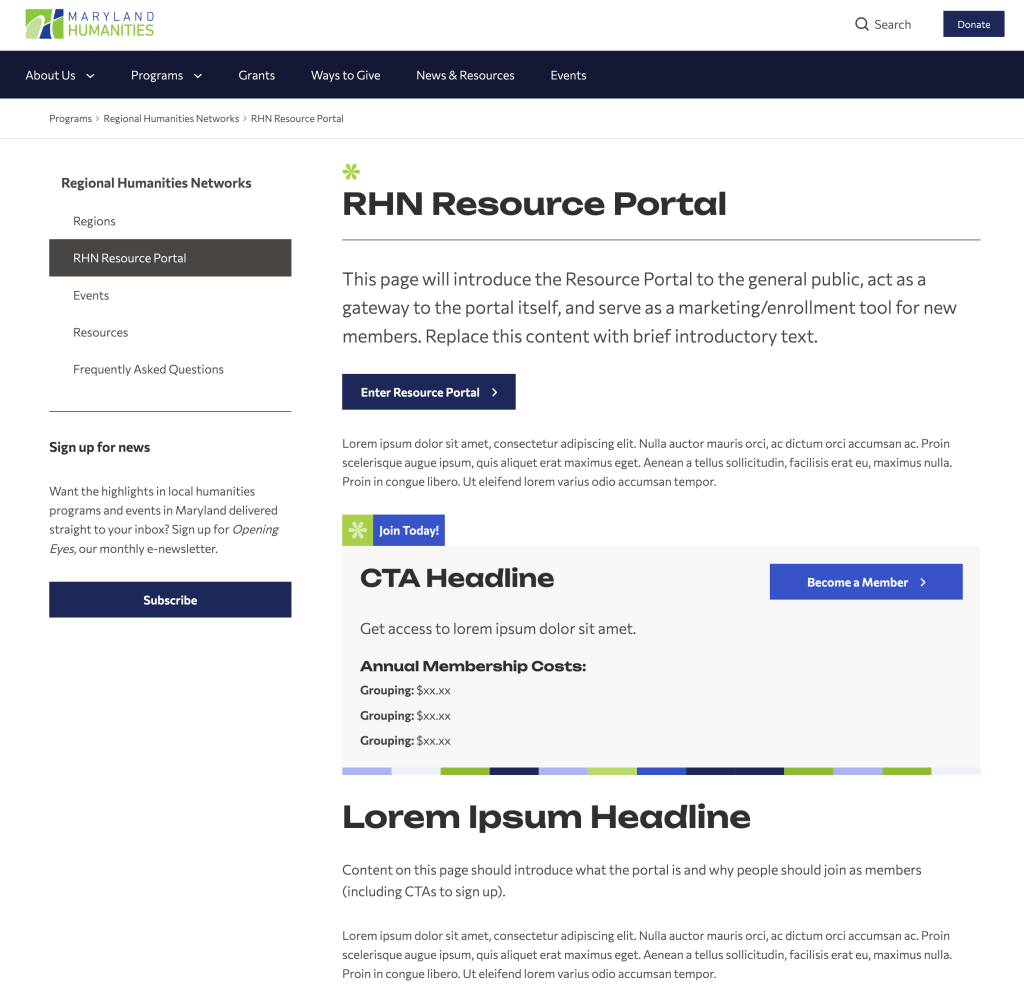
Logged in users will not see the login form: they will only see a button to enter the portal. That button will link them to the Portal Index.
Logged Out
Logged In
Portal Index
The Portal Index is the portal’s homepage. This page is hidden for non-members. Similar to news archives, the Portal Index lists all the available resources in chronological order by date published. It provides tools to allow users to find resources their looking for: filters and search.
Users can filter resources by the following custom taxonomies:
- Resource Type: type of resource such as video, document, or slide deck.
- Resource Topic: topic of the content of the resource.
- Resource Series: see all resources in a particular series.
Users can also search resources. Searching from the Resource Index will return only resource items, not content from elsewhere in the site.
Resource Detail
Each resource is displayed in a detail template. The template displays the resource content, plus the search & filter sidebar.
A resource can contain any content, similar to other pages on the site. Adding summary information will help the search functionality identify resources more accurately.
Adding New Resources
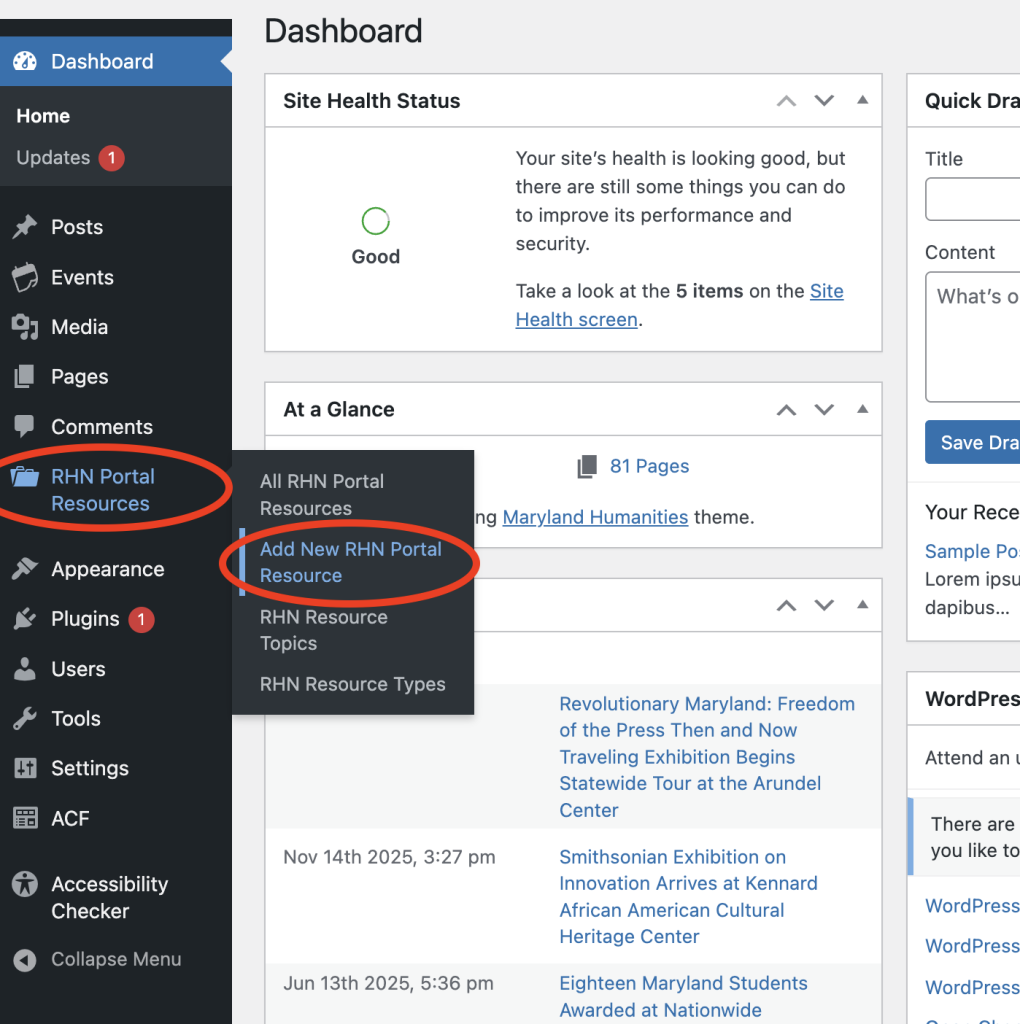
To add new resources, go to your Admin Dashboard > RHN Portal Resources > Add New RHN Portal Resource.
The resource page can contain any content. Where possible, use embeds or iframes so the user can view the resource within the MDH website.
The resource page can also contain summaries, links, and keywords for content in the resource. The more information you can provide about the resource in the text of the page, the better the search function will work for “unsearchable” content like videos.
Adding Taxonomies to a Resource
Use the Page settings sidebar on the right side of the edit page to add taxonomy data (type, topic, or series) to a resource.
Changing Resource Pages
The portal member restriction system depends on the system knowing which pages to restrict, and where to redirect logged-out users.
Restricted Pages
- Portal Items / Detail Pages: these are automatically hidden from logged-out users due to being a custom post type (RHN Portal Resource).
- Portal Index Page: this page must be set in MDH Settings. Remember to update it if the page needs to be deleted/recreated in the future.
Redirect Page
The Portal Gateway Page must be set in MDH Settings to ensure logged-out users that land on a restricted portal page are redirected to a prompt to login to the portal.
How to find MDH Settings: Dashboard > Settings > MDH Settings.